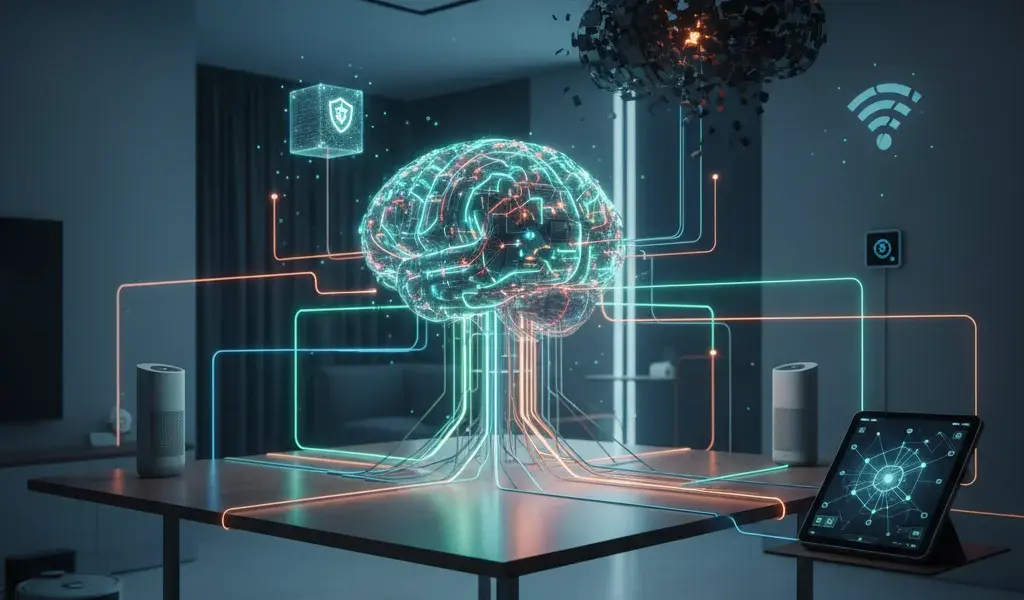
Have you ever been annoyed when your smart speaker suddenly went "bad" and couldn't turn on the light just because the network dropped? I did, and that's why I found the Home Assistant smart home automation platform. This is not just a software, but the answer to a system that is truly "yours". It acts as a central brain that operates right at home, ensures privacy and does not depend on the "cloud" of any technology giant. If you are confused about What is Home Assistant, then this article is the most detailed map for you.
Why is Home Assistant a "true love" for people who "play" with smart homes?
Home Assistant offers absolute freedom thanks to local control, highly customizable and completely independent of an external Internet connection.
At Pham Hai, during 10 years of consulting and implementing smarthome solutions, I realized that the biggest inhibition of users is latency. You press the button on your phone, the signal travels to a foreign server, then turns around and turns on the light bulb in front of you. It's a ridiculous waste of resources and a very poor experience.
Regain 100% control: Say goodbye to worries about servers and network failures.
The system processes commands directly in your home, ensuring instant response speed and maximum Home Assistant privacy security.
The biggest difference lies in the fact that Home Assistant operates locally (Local Control). This means that even if the undersea fiber optic cable has problems, your home will still operate smoothly. The automation scripts are not interrupted or delayed.
Furthermore, the local control feature helps data security absolutely. Videos from cameras in your home or your family's daily routine will not be sent to any third party for analysis.
"Accept" all devices: Freely combine from Google, Apple to unknown "domestic" products.
Home Assistant allows you to connect thousands of devices from different communication standards such as Zigbee, Z-Wave or Wi-Fi into a single management platform.
Do you have expensive Philips Hue light bulbs, an air conditioner using Google Home, and some cheap smart switches bought on e-commerce platforms? Do not worry. integrating devices into Home Assistant will bring them all together in one place to work well together. You can even bring standard Apple HomeKit or Amazon Alexa devices into the same ecosystem.
For those who are passionate about making porridge (DIY), adding cheap microcontroller circuits or homemadesensors is also extremely easy. This is a great stepping stone for you to learn more deeply about the world of everything connected. If you are not clear about this concept, this article about IoT Internet of Things for beginners will help you grasp the most basic foundation.
Quick and candid comparison: Home Assistant vs. Google Home/Alexa.
Unlike the closed nature of major technology companies, Home Assistant is an open source smart home automation platform, allowing deep customization and extremely detailed energy management.
To compare Home Assistant and Google Home objectively, I created the table below based on actual experience updated until March 2026. You will clearly see the difference in design philosophy:
| Criteria | Home Assistant | Google Home / Alexa |
|---|---|---|
| Mô hình hoạt động | Local (Fast, no network needed) | Cloud (High latency, network dependent) |
| Khả năng mở rộng | Tùy biến cao, mã nguồn mở | Limited according to the company's framework |
| Quyền riêng tư | Data is saved on the hard drive at home | Data is collected on the company server |
Get to work: Build your own home brain.
You can easily install the system on a variety of hardware, from compact boards to powerful virtual servers, depending on your needs and budget.
With Home Assistant for beginners, choosing the right hardware will determine the stability of the whole system in the long run. I always advise you to start with affordable devices before upgrading to complex systems. The journey of building a self-built Smart home system brings an extremely satisfying feeling of mastering technology.
Hardware options for beginners: Raspberry Pi is enough to start!
Raspberry Pi 4 hoặc thế hệ mới nhất là Raspberry Pi 5 chính là lựa chọn hoàn hảo về chi phí, kích thước và hiệu năng năng lượng cho người mới nhập môn DIY smart home.
It consumes extremely little electricity (only about 3-5W), runs smoothly 24/7 without emitting unpleasant noise. You just need to buy a good MicroSD memory card (A2 standard) to have a powerful mini server. However, if you intend to use it long-term, I recommend that you invest in an external SSD hard drive via USB 3.0 port to ensure write and read speed and avoid sudden memory card failure.
Instructions for installing Home Assistant OS on Raspberry Pi in 3 simple steps.
Just use Raspberry Pi Imager software, flash Home Assistant OS onto a memory card or SSD, then plug in the network cable and boot and the system is ready.
Cách cài đặt Home Assistant trên Raspberry Pi hiện nay đã dễ thở hơn rất nhiều so với những năm trước. Dưới đây là hướng dẫn cấu hình Home Assistant cơ bản nhất mà ai cũng làm được:
- Download and install the official Raspberry Pi Imager software to your computer.
- Open the software, select "Choose OS" -> "Other specific-purpose OS" -> "Home automation" -> Select "Home Assistant" (choose the correct version for Pi 4 or Pi 5).
- Chọn ổ đĩa thẻ nhớ/SSD, bấm "Write" và chờ đợi. Sau khi hoàn tất, cắm ổ cứng vào Pi, nối dây mạng LAN từ router vào và truy cập địa chỉ
http://homeassistant.local:8123trên trình duyệt để tạo tài khoản.
Options for those who like to "dabble": Install on a virtual machine or Docker.
If you have an existing PC, Mini PC or NAS system, installing Home Assistant on a virtual machine or via Docker will help make the most of your existing hardware.
This model is extremely suitable for those who want to run multiple server services at the same time. You can install Home Assistant Core via Docker to make the system extremely light and flexible. Or more professionally, use Proxmox to create a virtual machine to install the complete package with Supervisor included.
The advantage of the version with Supervisor is that you can install add-ons (extensions) with just one click. For example, install the MQTT broker add-on to connect the device, or add-on file management directly on the browser.
Create your first automation scenario: When your home truly "lives" and understands you.
Automation is the soul of the system, helping devices interact with each other based on your family's habits, time and living context.
After installation is complete, creating a Home Assistant automation script is the next step to "breathe life" into the house. Especially in the March 2026 update (version 2026.3), the "Continue on error" feature has been brought directly to the visual interface, helping scenarios run more smoothly even when a device in the chain loses connection.
Learn core concepts: What are "Entities" and "Services"?
"Entities" are the physical devices or sensors in your home, and "Services" are the commands or actions you want them to perform.
Mọi thứ trong hệ thống đều được quản lý dưới dạng entitites. Cảm biến nhiệt độ là một entity, bóng đèn phòng khách là một entity. Khi bạn muốn bóng đèn sáng lên, bạn gọi một Service có tên là light.turn_on và nhắm mục tiêu vào entity bóng đèn đó. Nắm vững cặp bài trùng này, bạn sẽ làm chủ được 90% logic vận hành của hệ thống.
Real-life example: My "Good Morning" scenario – lights on, curtains open and chill music.
When the sensor detects motion at 6 a.m., the system will automatically open the curtains 50%, turn on warm yellow lights and play your favorite Spotify playlist.
This is one of the benefits of Home Assistant that I like the most. I set the condition for the time period from 6:00 a.m. to 7:00 a.m. The trigger action (Trigger) is when I step down the stairs. The result is a perfectly prepared morning space, the coffee maker automatically turns on without me having to touch any phone.
Automate with an intuitive interface for beginners.
Giao diện người dùng của Home Assistant ngày càng được tối ưu hóa thân thiện, cho phép bạn tạo kịch bản logic chỉ bằng cách kéo thả và chọn từ các menu có sẵn.
You absolutely do not need to be a programmer to use it. Recent updates have delivered a great experience on both desktop and mobile apps. You just need to choose according to the structure: "If this happens..." (Trigger) -> "Check the condition..." (Condition) -> "...Then perform this action" (Action). You can even now schedule cleaning for the robot vacuum cleaner for each specific room right on the interface in an intuitive way.
Empower with YAML: When imagination is the only limit.
With the YAML language, you can write extremely complex logic code, combining many variables and algorithms that a visual interface sometimes cannot accommodate.
Once you get used to it, you will find that the drag and drop interface is sometimes a bit restrictive with "crazy" ideas. At this time, YAML is the ultimate weapon. You can use the Jinja2 template to calculate complex calculations. For example: "If the outdoor temperature is 2 degrees lower than indoors, it is not raining, and the air quality is good, automatically send a notification to open the window to let in natural wind."
Frequently asked questions when first "beginning".
Starting with a new platform always comes with questions about how to set up secure security and seek support when things go wrong.
I burned a few memory cards and misconfigured the internal network to the point of losing my entire family's life in the first days of practicing. Don't be discouraged, because the platform's user community is one of the most supportive and civilized tech communities in the world today.
Is Home Assistant really safe and private?
Yes, the system is extremely secure because all data is stored directly on your hardware, combined with strict layers of protection such as two-factor authentication.
You are in complete control of your server. To enhance security, I always advise customers at Pham Hai to turn on the two-factor authentication (2FA) feature for their admin accounts. By default, the system does not automatically open ports to the Internet, so the risk of being remotely attacked by hackers is almost zero if you follow basic network principles.
How to safely access and control smart home remotely?
You can use the paid Nabu Casa cloud service to support the development team, or set up your own VPN/Cloudflare Tunnel completely free.
Nabu Casa là cách nhanh nhất, dễ nhất và an toàn nhất để truy cập từ xa mà không cần phải can thiệp vào router để mở cổng mạng (port forwarding). Dịch vụ này cũng giúp bạn liên kết mượt mà với Google Assistant hay Alexa chỉ bằng một cú click. Ngược lại, nếu bạn có kiến thức về IT, việc tự cấu hình chứng chỉ bảo mật SSL/TLS qua DuckDNS hay thiết lập đường hầm Cloudflare Zero Trust sẽ giúp bạn tiết kiệm chi phí hàng tháng mà vẫn đảm bảo an toàn tuyệt đối.
What should I do if I'm too "stuck"? Join the Home Assistant Vietnam community to find help.
The user community in Vietnam is very large and quality, always ready to share experiences in fixing software errors and interesting hardware manufacturing projects.
On Facebook groups or major technology forums, you will find countless articles sharing from the most basic steps to advanced techniques. There are even brothers who design their own printed circuits and write code for cheap circuit boards to integrate deeply into the system. If you are interested in making your own hardware, try looking at ESP32 ESP8266 cheap IoT Wi-Fi projects - they are known as the indispensable "best friends" of automation enthusiasts.
Getting started with Home Assistant can be a bit overwhelming with dozens of new concepts. But believe me, the feeling of building a Home Assistant smart home automation system that is truly private, smart, and works durably to your liking is extremely worth it. It's not just a technology project for weekend entertainment, but a way for you to turn your inanimate home into a powerful assistant that truly understands and serves your life perfectly.
Are you ready to build your own truly smart home? Please share the automation scenario you are most excited about in the comments section below!
Lưu ý: Các thông tin trong bài viết này chỉ mang tính chất tham khảo. Để có được lời khuyên tốt nhất, vui lòng liên hệ trực tiếp với chúng tôi để được tư vấn cụ thể dựa trên nhu cầu thực tế của bạn.