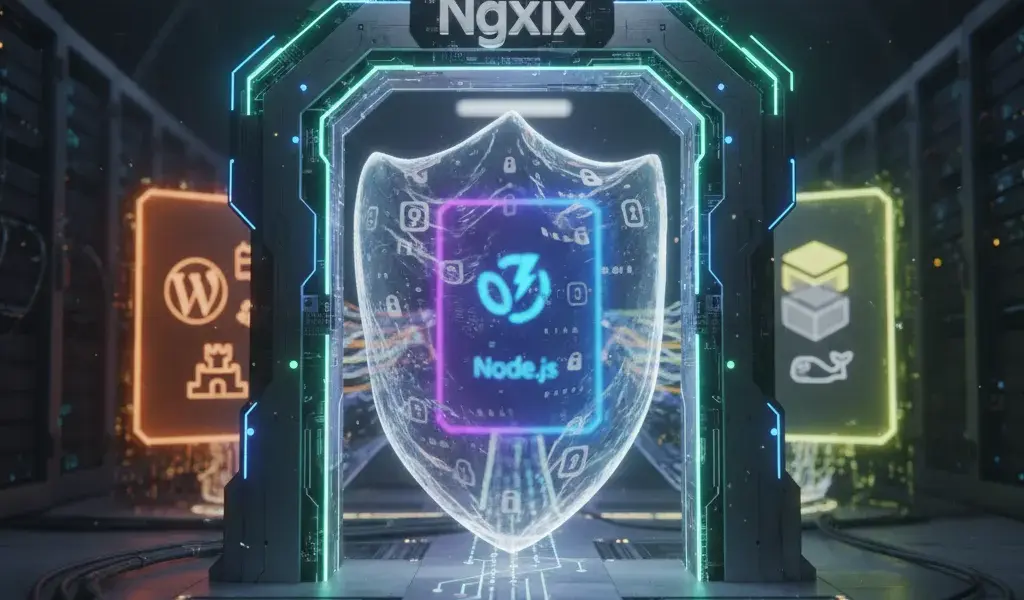
Ever sweated having to manage SSL for dozens of different webapps? Me too. Turns out, with just one Nginx standing in the middle as a reverse proxy, everything becomes incredibly simple. At Pham Hai, I always prioritize this model because it not only helps you centrally manage Nginx SSL reverse proxy configuration for all back-end applications, from WordPress, Node.js to Docker, but also significantly enhances a layer of security and optimizes performance. Just imagine Nginx as a diligent gatekeeper, taking care of all the messy coding, so you can focus on your code with peace of mind.
"Standard without adjustment" instructions for configuring Nginx Reverse Proxy with SSL Let's Encrypt
Nginx reverse proxy SSL là gì? Đây là kỹ thuật dùng Nginx làm máy chủ trung gian tiếp nhận request HTTPS, giải mã (SSL termination) và chuyển tiếp đến các ứng dụng backend, giúp bảo mật và tối ưu hiệu suất.
To start step-by-step Nginx reverse proxy SSL configuration guide, we need to prepare a clean Ubuntu server. If you are wondering which software to choose as a proxy, the article Nginx vs Apache compare web server 2026 will give you a satisfactory answer. Currently, Nginx excels at handling thousands of concurrent connections and consumes very little RAM resources.
Step 1: Install Nginx and Certbot - Solid foundation
To deploy Nginx reverse proxy SSL, you need to install the latest version of Nginx (like 1.29.x) and Certbot on the Linux operating system (Ubuntu) via command line.
Tính đến tháng 3/2026, Nginx đã ra mắt phiên bản 1.29.6 với nhiều cải tiến. Bạn nên cập nhật bản mainline mới nhất để tránh các lỗi bảo mật nghiêm trọng (như CVE-2026-1642). Việc cài đặt trên Ubuntu cực kỳ đơn giản qua vài dòng lệnh apt update và apt install nginx.
Nếu bạn là một nhà phát triển web chưa quen với command line, việc bổ sung kiến thức Quản trị Linux server cơ bản cho developer là bước đệm tuyệt vời. Sau khi cài Nginx, đừng quên cài thêm Certbot (apt install certbot python3-certbot-nginx) – công cụ đắc lực của các Kỹ sư DevOps để tự động hóa quá trình cấp phát chứng chỉ.
Step 2: Get a free SSL certificate from Let's Encrypt
Use Nginx Certbot SSL to automatically issue and renew SSL certificates from Let's Encrypt for your domain via Port 80 quickly.
In 2026, Let's Encrypt had major updates, supporting both short-term 6-day certificates and certificates for IP. However, for regular websites, a 90-day certificate (Let's Encrypt will soon shorten it to 45 days) is still the standard. To better understand the nature of these types of encryption, you can refer to What is SSL HTTPS and how to install it for your website.
Chỉ cần chạy lệnh sudo certbot --nginx -d yourdomain.com, Certbot 5.x sẽ tự động xác thực, sinh khóa và cài đặt chứng chỉ vào đúng file cấu hình của Nginx. Hãy nhớ đảm bảo tên miền đã được trỏ đúng về IP máy chủ của bạn trước khi chạy lệnh nhé.
Step 3: Configure the "all-in-one" server block file for Nginx
Tạo file cấu hình trong /etc/nginx/conf.d/ với các chỉ thị Server block và Location block để định tuyến traffic từ Cổng 443 về backend.
Đây là lúc cách cấu hình Nginx reverse proxy SSL thể hiện sức mạnh. Bạn sẽ tạo một file cấu hình mới (ví dụ: myapp.conf), khai báo tên miền ở chỉ thị server_name và đường dẫn tới chứng chỉ Let's Encrypt vừa lấy.
Inside Location block, we will set up Nginx Let's Encrypt reverse proxy to receive encrypted traffic. All of this secure traffic will then be pushed back to your real application through dedicated proxy commands.
Step 4: Redirect all HTTP traffic to HTTPS - Required for SEO
Cấu hình Nginx chuyển hướng HTTP sang HTTPS bằng cách dùng lệnh return 301 ở server block lắng nghe Cổng 80 để ép buộc dùng giao thức bảo mật.
No one wants users to access a website with a red "Not Secure" warning on the browser. Enforcing the use of HTTPS is the required standard in today's product environment.
Nginx sẽ tự động bắt các request đến HTTP và đẩy thẳng sang HTTPS thông qua đoạn code: return 301 https://$host$request_uri;. Điều này không chỉ bảo vệ dữ liệu người dùng mà còn giúp Google đánh giá cao thứ hạng SEO cho website của bạn.
Step 5: Test and restart Nginx
Luôn chạy lệnh nginx -t để test cú pháp trước khi dùng systemctl restart nginx nhằm áp dụng Cấu hình HTTPS Nginx reverse proxy mới.
A vital habit in server administration is to never restart a service without checking the configuration file. Just one missing semicolon (;) can crash the entire running web system.
Khi hệ thống trả về thông báo syntax is ok và test is successful, bạn mới an tâm khởi động lại dịch vụ. Lúc này, giao thức SSL/TLS đã chính thức hoạt động trơn tru trên server của bạn, sẵn sàng đón traffic.
"Dissecting" important directives in the Nginx configuration file
Understanding directives like Proxypass and Proxyset_header is the key to mastering Nginx SSL reverse proxy configuration like a pro.
proxy_pass: "Directions" for where the request goes
Lệnh proxy_pass xác định địa chỉ IP và cổng của máy chủ backend (VD: http://127.0.0.1:3000) mà Nginx sẽ chuyển tiếp traffic tới.
Khi cấu hình Nginx reverse proxy nhiều domain SSL, mỗi domain sẽ có một proxy_pass trỏ về một ứng dụng hoặc service khác nhau. Nó đóng vai trò như một tổng đài viên nội bộ phân luồng cuộc gọi.
Thay vì client kết nối trực tiếp với app, Nginx sẽ đứng ra nhận request, đọc cấu hình proxy_pass và "chạy cò" đi lấy dữ liệu từ backend tương ứng, sau đó trả ngược lại cho người dùng.
proxysetheader: What information to send to the real server?
proxy_set_header giúp Nginx truyền các thông tin quan trọng của client gốc như X-Forwarded-For và X-Real-IP cho ứng dụng phía sau.
Because Nginx acts as an intermediary, the backend application will think Nginx is the direct access person (IP is usually 127.0.0.1). This makes it seriously difficult to log users' real IPs or limit access.
Host $host;: Giữ nguyên tên miền gốc mà client gõ vào trình duyệt.X-Real-IP $remote_addr;: Chuyển tiếp địa chỉ IP thật của người dùng cuối.X-Forwarded-Proto $scheme;: Báo cho backend biết client đang dùng HTTP hay HTTPS.
Thanks to these headers, the backend can operate exactly as if it were communicating directly with the client outside the Internet.
What is SSL Termination? Why is it the "heart" of this model?
SSL termination là quá trình Nginx đứng ra giải mã dữ liệu Mã hóa ở lớp ngoài cùng, giảm tải tính toán cho các backend server.
Instead of each Node.js or WordPress application having to take care of installing, managing and decrypting SSL certificates (which is very CPU intensive), Nginx will take care of this. Data from the browser to Nginx is securely encrypted over the Internet.
After going through Nginx, the data is decrypted and goes to the backend in plain text (usually over a closed localhost internal network). This helps optimize performance extremely effectively for the entire server system. In some cases that require extremely high internal security, you can configure Mutual TLS or use Self-signed certificate between Nginx and the backend.
Deploy to real applications: WordPress, Node.js, and Docker
Depending on the system architecture, how to configure Nginx reverse proxy SSL for WordPress, Node.js or Docker will have separate tweaks.
With WordPress: Configure to avoid "redirect loop" errors
Khi dùng Nginx reverse proxy SSL cho WordPress, bạn cần đảm bảo Nginx gửi đúng header và thêm $_SERVER['HTTPS'] = 'on'; vào file wp-config.php để tránh lỗi lặp chuyển hướng.
WordPress often gets "stuck" when behind a reverse proxy. It does not recognize traffic that is HTTPS, so it constantly forces users to redirect between HTTP and HTTPS, creating an endless loop (ERRTOOMANY_REDIRECTS). To completely solve the infrastructure problem, you can read the article Configure Ubuntu VPS to run WordPress from scratch to clearly understand the file structure of WP.
Tại Phạm Hải, mình luôn nhắc anh em Dev phải thiết lập header X-Forwarded-Proto trong Nginx. Chỉ cần cấu hình đồng bộ giữa Nginx và mã nguồn WP, lỗi này sẽ biến mất.
With Node.js: Point the proxy to the correct port of your application (eg port 3000)
Nginx reverse proxy SSL cho Node.js cực kỳ đơn giản, chỉ cần dùng proxy_pass http://localhost:3000; để trỏ thẳng vào process đang chạy nền (thường qua PM2).
Web applications written in Node.js (like Express, NestJS) often run at high ports (like 3000, 8080) and they themselves are not designed to handle SSL optimally. Nginx will cover the outside, listen to Port 443 and push clean traffic to port 3000.
This model makes your Node.js application more secure, does not expose ports directly to the Internet, and takes advantage of Nginx's extremely fast static file serving ability.
With Docker: Use the container name in the Docker network to proxy_pass
Nginx reverse proxy SSL cho Docker cho phép dùng trực tiếp tên container làm hostname trong proxy_pass nếu chúng cùng chung một Docker Compose network.
Thay vì dùng IP tĩnh dễ bị thay đổi mỗi lần restart container, bạn hãy tận dụng tính năng phân giải DNS nội bộ của Docker. Ví dụ, nếu container của bạn tên là api_backend, Nginx có thể trỏ thẳng tới proxy_pass http://api_backend:8080;.
The combination of Nginx and Docker provides great scalability, helping you easily deploy dozens of microservices on the same server without fear of port conflicts.
Common "oh my god" errors and how to fix them in 5 minutes
The Troubleshooting Nginx process cannot avoid common Nginx reverse proxy SSL configuration errors such as 502 Bad Gateway or mixed content errors.
Error 502 Bad Gateway: "Gatekeeper" could not find the real server
Error 502 occurs when Nginx cannot connect to the backend, usually due to the application crashing, port misconfiguration, or Firewall blocking internal connections.
This is the most classic error that everyone has ever encountered. When you see screen 502, don't rush to edit the Nginx file. Check that the backend application (Node.js app, Docker container) is actually running and listening to the correct port.
Đôi khi, chỉ vì backend khởi động chậm hơn Nginx một chút cũng gây ra lỗi này. Hãy check log bằng lệnh tail -f /var/log/nginx/error.log để biết chính xác nguyên nhân Nginx bị từ chối kết nối.
Blank page error or CSS not loading: Problem with mixed content
When Nginx runs HTTPS but the backend returns a static resource link (CSS, JS) in HTTP format, the browser will block the resource due to mixed content error.
Modern browsers are very strict with security. If the original page is HTTPS and tries to load an image file or script via HTTP, it will block immediately, resulting in a broken or blank web interface.
Cách fix nhanh nhất là đảm bảo bạn đã truyền đúng header X-Forwarded-Proto và cấu hình Base URL của ứng dụng backend (ví dụ như cấu hình URL trong file .env của Node.js) thành https://.
Warning about "trailing slash" in proxy_pass - one small detail ruins it all
Dấu gạch chéo (/) ở cuối URL trong lệnh proxy_pass sẽ thay đổi hoàn toàn cách Nginx viết lại đường dẫn (URI rewriting) khi đẩy về backend.
Nếu bạn viết proxy_pass http://localhost:3000; (không có slash), Nginx sẽ giữ nguyên đường dẫn gốc. Nhưng nếu viết proxy_pass http://localhost:3000/;, Nginx sẽ cắt bỏ phần khớp ở location trước khi gửi đi.
Chỉ một dấu / thừa hoặc thiếu cũng khiến ứng dụng backend không hiểu route và trả về lỗi 404 Not Found. Hãy cẩn thận kiểm tra kỹ chi tiết nhỏ bé nhưng đầy quyền lực này.
Advanced Security and Optimization - When You Want to Be a "Pro"
To fully Optimize Nginx reverse proxy SSL, you need to combine the HTTP/2 protocol, security headers and Load Balancing techniques.
Enable HTTP/2 to increase website speed
Thêm tham số http2 on; vào cấu hình server block để kích hoạt giao thức HTTP/2, giúp tăng tốc độ tải trang đáng kể nhờ tính năng multiplexing.
From new Nginx versions (1.25 and above), the HTTP/2 enable syntax has changed to be a standalone directive instead of being attached to the listen directive. This protocol helps the browser download dozens of resources (images, css, js) in parallel on a single TCP connection.
This is the "secret weapon" that helps your website load lightning fast, reduce latency and directly improve Google's Core Web Vitals score.
Add security headers: HSTS, X-Frame-Options, X-Content-Type-Options
Bảo mật Nginx reverse proxy SSL bằng cách bổ sung HSTS và các HTTP header chống clickjacking, sniffing để bảo vệ người dùng khỏi các cuộc tấn công.
Bạn nên cấu hình Nginx trả về header Strict-Transport-Security (HSTS) để ép trình duyệt luôn dùng HTTPS trong tương lai. Kích hoạt thêm OCSP stapling cũng là một cách hay để tăng tốc độ xác minh chứng chỉ SSL. Để lớp bảo mật thêm vững chắc từ vòng ngoài, bạn nên xem qua Cloudflare DNS hướng dẫn cài đặt cơ bản nhằm ẩn IP gốc của server.
In addition, combining with Linux VPS security against hacking attacks measures such as UFW and Fail2Ban firewall configuration is extremely necessary to protect against automatic vulnerability scans. Configuring SNI (Server Name Indication) correctly also helps Nginx serve the right certificate for the right domain when you host multiple websites on one IP.
Load Balancing with Nginx for multiple backend servers
Nginx reverse proxy cân bằng tải SSL sử dụng block upstream để phân phối traffic đều cho nhiều server backend, gia tăng sức chịu tải của hệ thống.
Khi ứng dụng của bạn phát triển mạnh, một server backend duy nhất sẽ không gánh nổi lượng truy cập lớn. Lúc này, bạn chỉ cần khai báo một block upstream chứa danh sách các IP hoặc container backend.
Nginx supports many great algorithms such as Round Robin (default equal sharing), Least Connections (prioritises idle servers) or IP Hash (keeps sessions for users). This feature helps the system achieve High Availability without interrupting the user experience even if a backend goes down.
Configuring Nginx SSL reverse proxy configuration may seem a bit "difficult" at first with many declaration steps, but once you do it, you will find it worth every minute. Not only is it a core DevOps skill, it's also an incredibly powerful, flexible solution for managing, securing, and scaling your web systems. At Pham Hai, I believe that after this detailed guide, based on the latest standards and updates of 2026, you can completely confidently apply it to any of your complex projects.
Have you successfully configured a proxy for your system? If you have any problems at any step or encounter a confusing 502 error, don't hesitate to leave a comment below, I will assist as best I can!
Lưu ý: Thông tin trong bài viết này chỉ mang tính chất tham khảo. Để có lời khuyên tốt nhất, vui lòng liên hệ trực tiếp với chúng tôi để được tư vấn cụ thể dựa trên nhu cầu thực tế của bạn.